Wednesday, June 22, 2011
Friday, June 17, 2011
Second Model Arrived from Shapeways!


There is an error in this model, very clearly seen on the left side, but I can hide this when assembling the models together for presentations and exhibition. This error was not found in the Shapeways checks, so the model was printed with the error. It is a bit disappointing but not the end of the world because it can be easily hidden.
Friday, June 10, 2011


Tuesday, June 7, 2011
Another Shapeways Error!! :(
 This is the third error I have had from Shapeways :(
I have already fixed this model, so I don't know why this has happened again, but I will try and fix it again and upload as soon as possible. One of the models is currently being shipped, and another is in production. So those two should get here in time for submission on Tuesday.
Monday, June 6, 2011
Making Iterations in Grasshopper
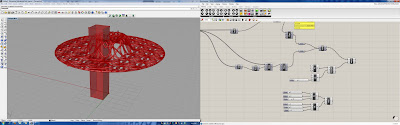
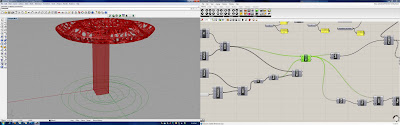
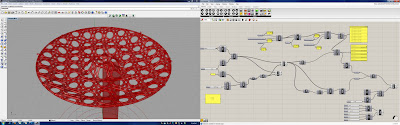
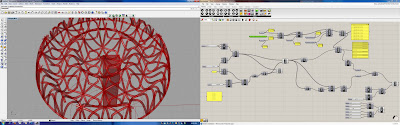
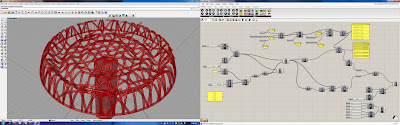
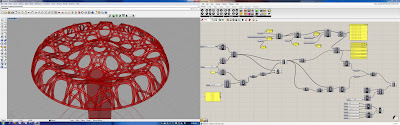
This was my first attempt at changing the model so that it wasnt just a dome with different patterns on it for the iterations. Though the dome was part of my concept, and thats why I got them 3D printed, I was interested in seeing what would happen if I changed the main shape of the model but had the same pattern on it. I added nodes (highlighted) to choose 4 random circles out of the 8 in the series and move them via the Z-axis, rather than all of them. This wasn't the best result though.
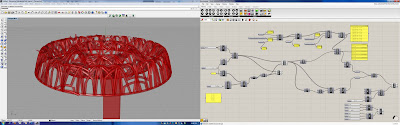
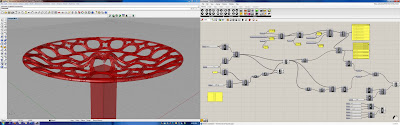
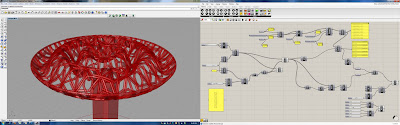
 Then I added a box to represent one of the buildings, to think about while doing the iterations, although I don't think I will include them in my renders because they take away from the main elegant form I am after. Though they are a very important part of the project because apartments and retail areas is what is required for this space in the city, for this assignment the main purpose is a proposal, and I think the concept would be best shown in the iterations without the buildings underneath. While the main model will of course have buildings, and the fabrication will include buildings also.
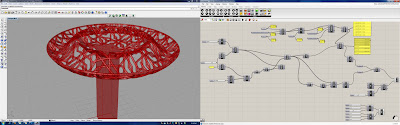
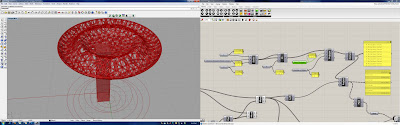
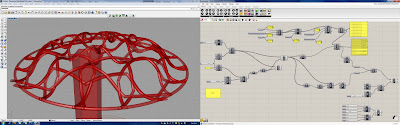
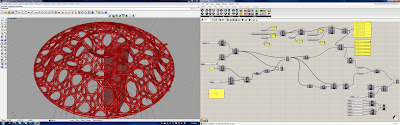
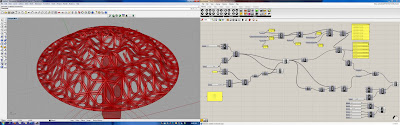
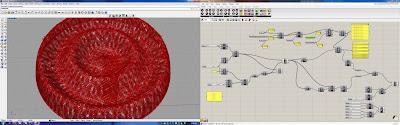
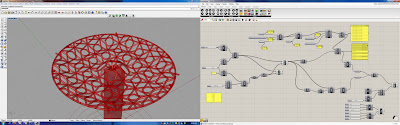
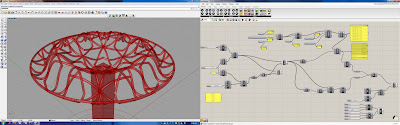
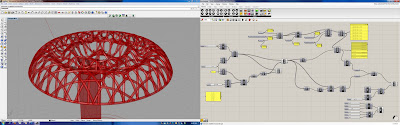
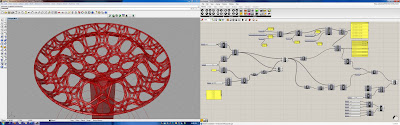
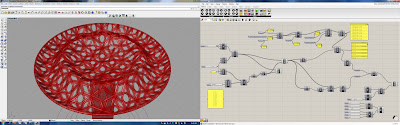
Here is the final change I made to the Grasshopper file in order to produce more interesting and consistent iterations. Changing the seed number changed the arrangement of the circles, and which ones were chosen to move via the Z-axis and which weren't. I also changed the number of items in the list chosen to move to 7 which made this work much better.
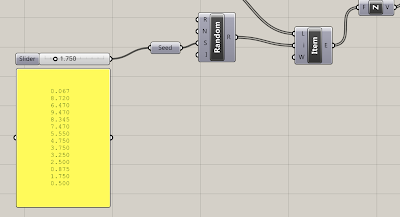
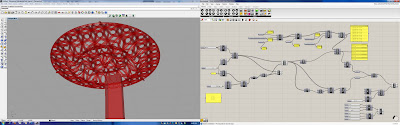
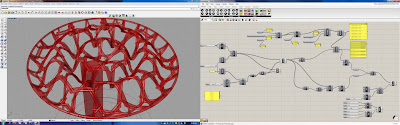
The image below shows the circles (the model disabled), and this made it easier to see what numbers for the seed would give a different looking model, and made the process much faster. Then when I found a good shape here I connected it back up with the model to enable it and could to change the pattern to get the best result for each iteration when I could see the shape of it.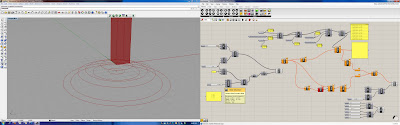

 Then I added a box to represent one of the buildings, to think about while doing the iterations, although I don't think I will include them in my renders because they take away from the main elegant form I am after. Though they are a very important part of the project because apartments and retail areas is what is required for this space in the city, for this assignment the main purpose is a proposal, and I think the concept would be best shown in the iterations without the buildings underneath. While the main model will of course have buildings, and the fabrication will include buildings also.
Here is the final change I made to the Grasshopper file in order to produce more interesting and consistent iterations. Changing the seed number changed the arrangement of the circles, and which ones were chosen to move via the Z-axis and which weren't. I also changed the number of items in the list chosen to move to 7 which made this work much better.

The image below shows the circles (the model disabled), and this made it easier to see what numbers for the seed would give a different looking model, and made the process much faster. Then when I found a good shape here I connected it back up with the model to enable it and could to change the pattern to get the best result for each iteration when I could see the shape of it.


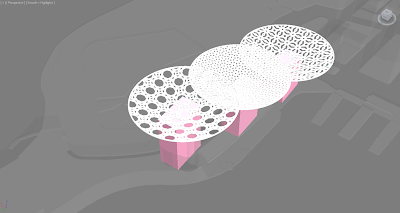
Models in 3DS Max with Buildings Underneath
Originally I had buildings directly under the 'Canopies', but then a friend told me that they looked like toadstools. I agree with her, and also realised that my aim was to not block the sun's light to the pedestrian area, and I think the buildings being in this position would do that.
 This was my friend's suggestion, turning them upside down, but I dont like this because it takes away from the shape of the space I wanted to create in the first place...
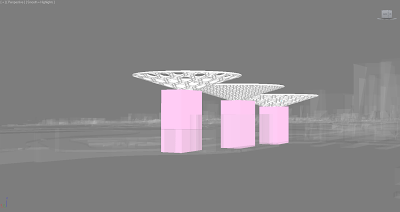
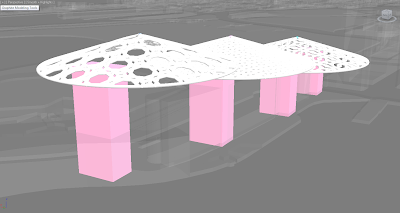
So i decided to move the buildings (or at least suggestions for where buildings might go..) to the sides of the Canopies, to hold them up like that instead of the middle.
Here is a side view of this. I really like the way that has turned out.

 This was my friend's suggestion, turning them upside down, but I dont like this because it takes away from the shape of the space I wanted to create in the first place...

So i decided to move the buildings (or at least suggestions for where buildings might go..) to the sides of the Canopies, to hold them up like that instead of the middle.

Here is a side view of this. I really like the way that has turned out.

My Laser Cutting Objects
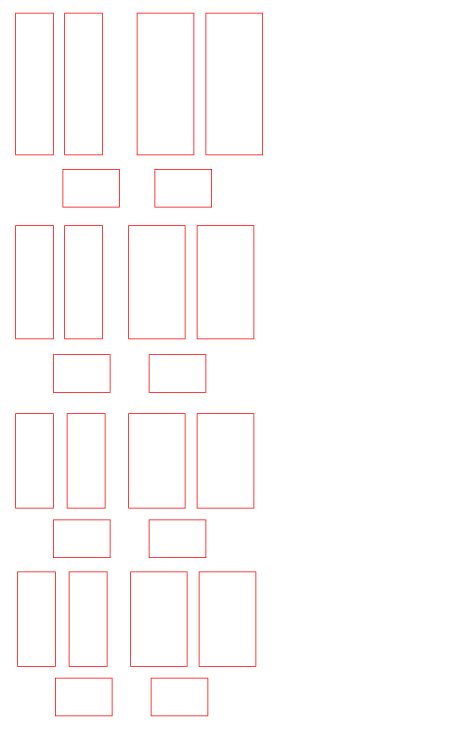
The buildings holding up the 'Canopy' will be laser cut. They are ordered and will be on 2mm Acrylic, with engravings for windows. I used acrylic because for the sake of this proposal I dont want the buildings underneath to take away from the design itself, and I want the natural light coming through the openings in the canopies to not be interrupted too much at this stage.
This image is the main shape of what will be fabricated, but windows have been added to this for the illustrator file.
Shapeways- Models Fixed and Uploaded/Ordered Again
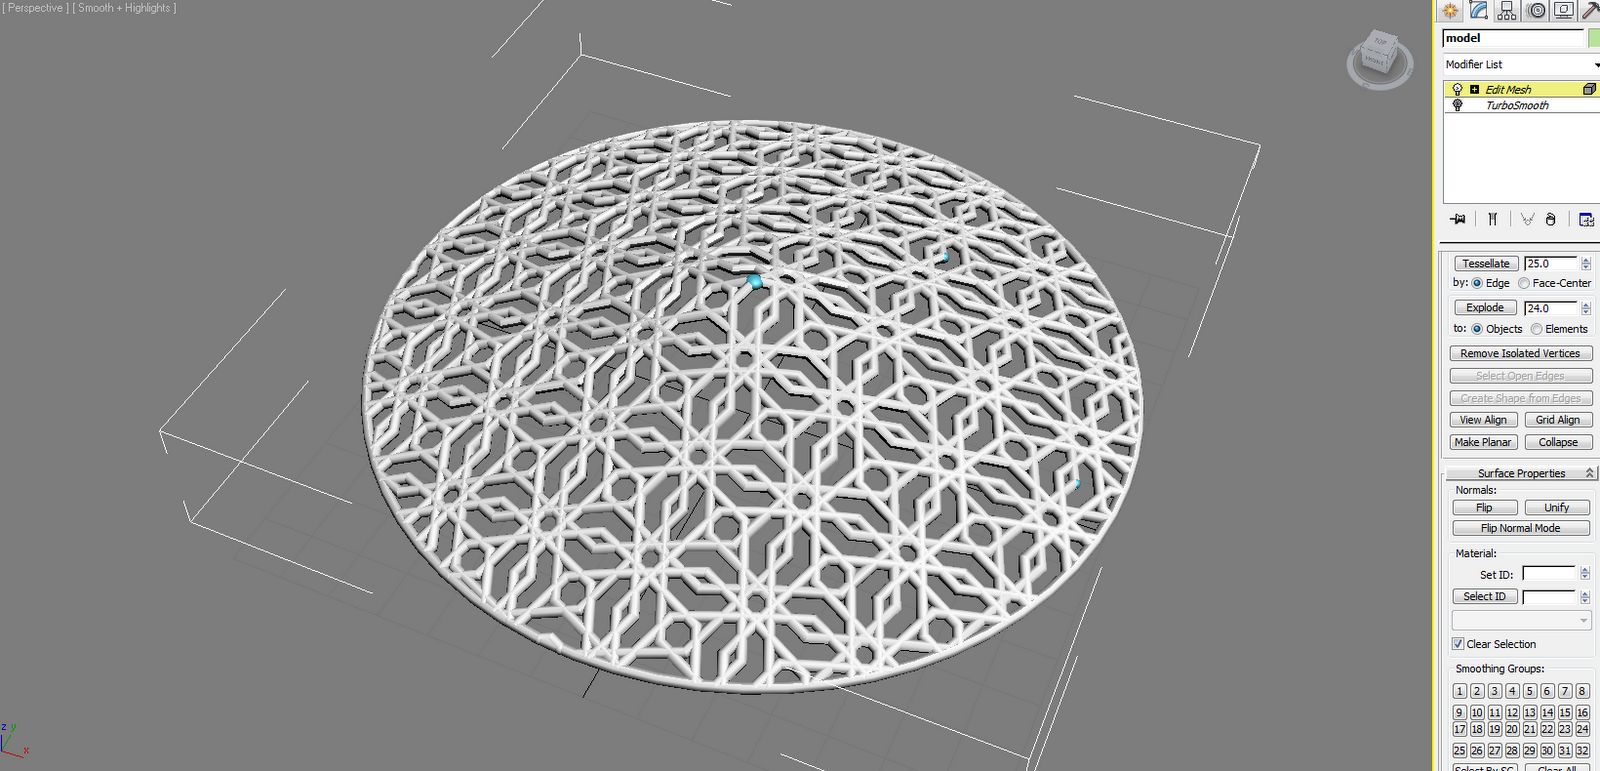
In an earlier post I showed images of my models in 3DS Max, and some of the pipes were shown in black rather than white... apparently this was the problem with 2 of my models for printing. So I used 'edit mesh' and selected all the pipes that were showing up as black and clicked Normals: Flip. This fixed the problem and I re-uploaded and ordered the 2 models from Shapeways. Today I got an email saying they are in the process of making them now! Still hoping they will arrive in time!


 This model didn't actually get an error for some reason, and will be arriving on Thursday (9th June), but I flipped the normals anyway.


 This model didn't actually get an error for some reason, and will be arriving on Thursday (9th June), but I flipped the normals anyway.
Friday, June 3, 2011
Shapeways Update: Error :(
Just got an email about errors with my model so am going to try and fix it with enough time before submission. Here are the screenshots they took of the model, although it does not look like this in my 3DS Max file.


Thursday, June 2, 2011
Arrangement on Site in 3DS Max
It was fun having a look at how I could arrange the models for the site together, rather than just using one of them at a time. When thinking more about the context of the site though, and how close it is to the Opera House, I think I would like to rearrange them to get higher as you get closer to that rather than lower, so sort of lead you there and be more welcoming. I will also be adding blocks in 3DS Max to show what the buildings underneath could be like, holding up the structure, replacing the ugly and controversial 'toaster' that currently sits there.


When I imported the models they were about 14cm in diameter each, and were a bit too big for the site, so I scaled them down to 70%, which makes them 98m in diameter in real life (The 3D printed models will be at scale of 1:700).


When I imported the models they were about 14cm in diameter each, and were a bit too big for the site, so I scaled them down to 70%, which makes them 98m in diameter in real life (The 3D printed models will be at scale of 1:700).
Subscribe to:
Comments (Atom)